Getting started with TI 6Lowpan SensorTag
TI released a nice (and cheap) device which supports Bluetooth, ZigBee and 6LowPan development. It provides some interesting sensors ; Temperature, Motion sensor, MCU, Humidity, Light sensor and Altimeter/Pressure.
In the next few weeks, I'll write some posts about my entire project ; Connect my Sensortag with a Zolertia Z1 through 6Lowpan networks, etc
At the end of this post, you will be able to run some example (provided by Contiki) on your SensorTag.

Requirements
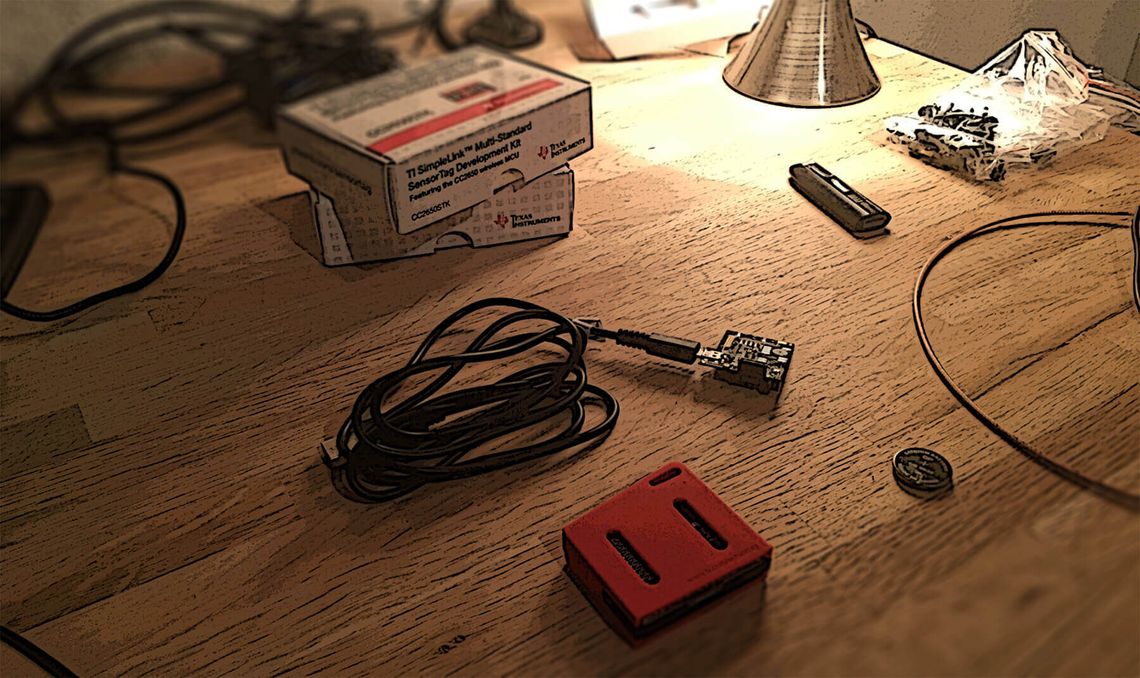
- 1 TI SensorTag --> TI website
- 1 SensorTag Debugger --> DevPack TI website or buy on Ebay
- Parallels Desktop (if you're on Mac OS) or WMWare
Plan
- Install Instant Contiki OS
- Update Debugger DevPack
- Flash the SensorTag
- Program the SensorTag with an example provided by Contiki
1. Install Instant Contiki
Contiki is an open-source operating system for the Internet of Things. It supports fully standard IPv6 and IPv4, along with the recent low-power wireless standards: 6lowpan, RPL, CoAP.
Instant Contiki will be useful for us to easily develop, compile and flash your hardware.
So now, you can download and start Instant Contiki :
- Download Instant Contiki
Version 3.0 includes all the right toolchains needed to build CC2538, CC13xx/CC26xx - Open it with Parallels Desktop or WMWare Player
- Start Instant Contiki
- Log in (password : user)
If you need more information, take a look here
2. Clone Contiki repository
You need to clone Contiki repository but also download every dependency about CC26XX (sensortag).
Open a new Terminal :
cd ~/Desktop/
mkdir contiki
cd contiki
git clone https://github.com/contiki-os/contiki.git
git submodule sync && git submodule update --init
git pull
Good, now your repository is up to date.
3. Update your Debugger DevPack
WARNING : I spend hours and hours to make it work. But I finally manage to make it work. This is how I did.
When you receive your Debugger DevPack, you need to update it in order to flash your Sensortag.
So, one way to update it with Instant Contiki is :
3.1 XDS Emulation Software Package
- Download XDS Emulation Software Package
. You need to create an account to TI website. - Install it :
sudo ./ti_emupack_setup_6.0.83.0_linux_i386.bin

3.2 Update your Debugger DevPack
Now we are going to use xdsdfu to update your firmware :
cd /opt/ti/ccs_base/common/uscif/xds110/- Connect your Debugger DevPack only! If your SensorTag is connected to your DevPack, you HAVE to unplug it!
- write :
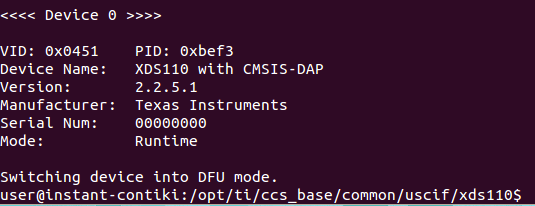
sudo ./xdsdfu -mResult :
USB Device Firmware Upgrade Utility
Copyright (c) 2008-2015 Texas Instruments Incorporated.  All rights reserved.

Scanning USB buses for supported XDS110 devices...


<<<< Device 0 >>>>

VID: 0x0451    PID: 0xbef3
Device Name:   XDS110 with CMSIS-DAP
Version:       2.2.4.1
Manufacturer:  Texas Instruments
Serial Num:    00000000
Mode:          Runtime

Switching devices into DFU mode.
As you can see, the firmware version is : 2.2.4.1
Upgrade it :
sudo ./xdsdfu -f firmware.bin -r
sudo ./xdsdfu -m
Result:
Okay you're up to date!
4. A simple example
4.1 Build it!
Open a terminal and go into contiki's example :
cd ~/Desktop/contiki/examples/cc26xx
We're going to build a simple example which shows you :
- How to read sensors
- How to use buttons and the reed relay
- How to send out BLE advertisements
Enough! Now Build it!
sudo make TARGET=srf06-cc26xx BOARD=sensortag/cc2650 cc26xx-demo.bin CPU_FAMILY=cc26xxAs you can see, the parameters are
- TARGET=srf06-cc26xx
- BOARD=sensortag/cc2650
- CPU_FAMILY=cc26xx
Output files are:
- cc26xx-demo.bin
- cc26xx-demo.elf <-- You will flash your SensorTag with it
If everything goes well, you need to flash your Sensortag with cc26xx-demo.elf file. To do it, you need Uniflash software.
4.2 Install Uniflash before flashing
Download and install Uniflash
sudo ./uniflash_setup_3.4.0.00003.bin
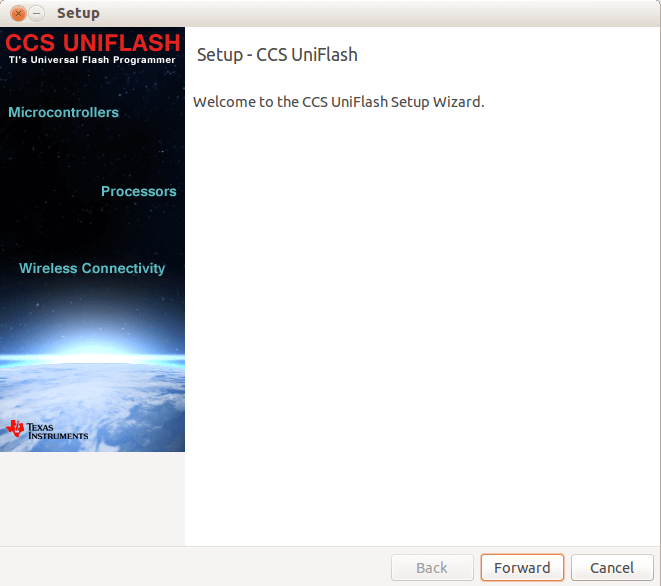
Then run Uniflash as root:
sudo /opt/ti/uniflash_3.4/eclipse/uniflash
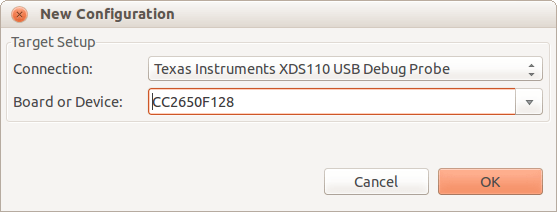
In Uniflash menu, click on : File --> New Configuration.
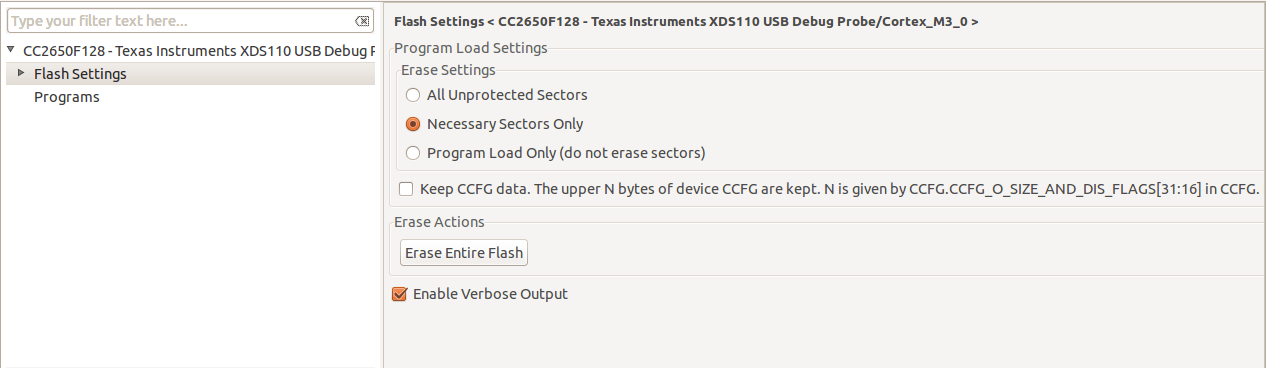
Select Texas Instruments XDS110 and CC2650F128
Select on Flash Setting menu and click on Erase Entire Flash.
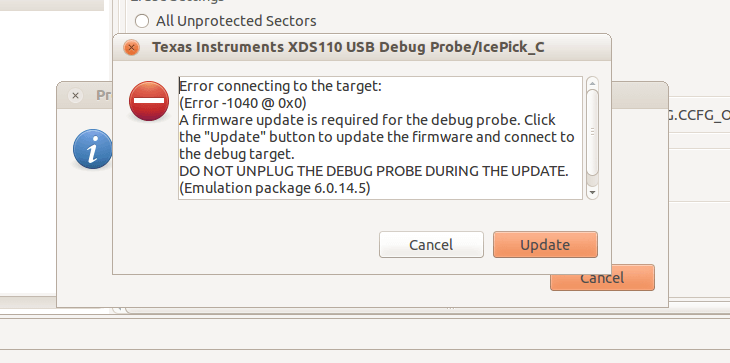
It'll tell you that you are not running the latest version and it needs to be upgrade.. (I know, you update it before... I don't know why it asks you to update it again)
Error connecting to the target: (Error -1040 @ 0x0) A firmware update is required for the debug probe. Click the "Update" button to update the firmware and connect to the debug target. DO NOT UNPLUG THE DEBUG PROBE DURING THE UPDATE.
Okay, don't worry, click on "Update".
If you have the following message, upgrade succeeded! Congratulations ;)
4.3 Flash your Sensortag with Uniflash
Last step! Hooray!
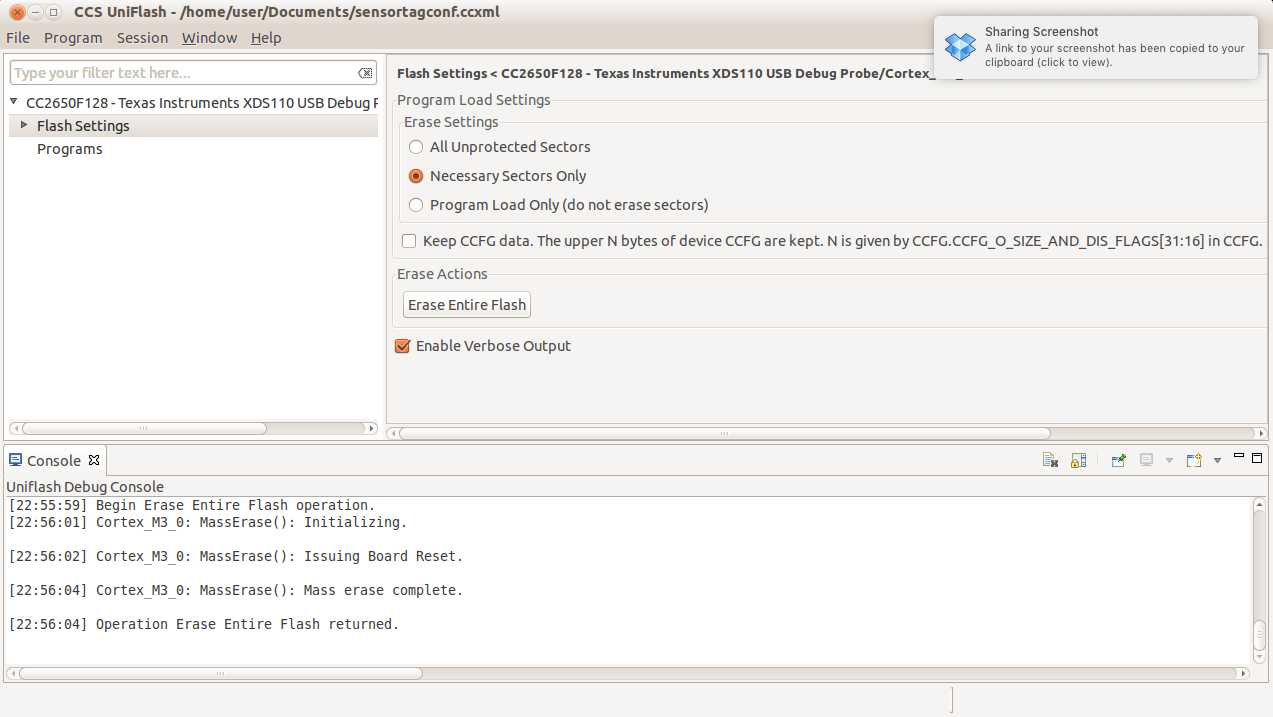
- Erase your Sensortag
Flash Settings --> Erase Entire Flash - Flash it with your program
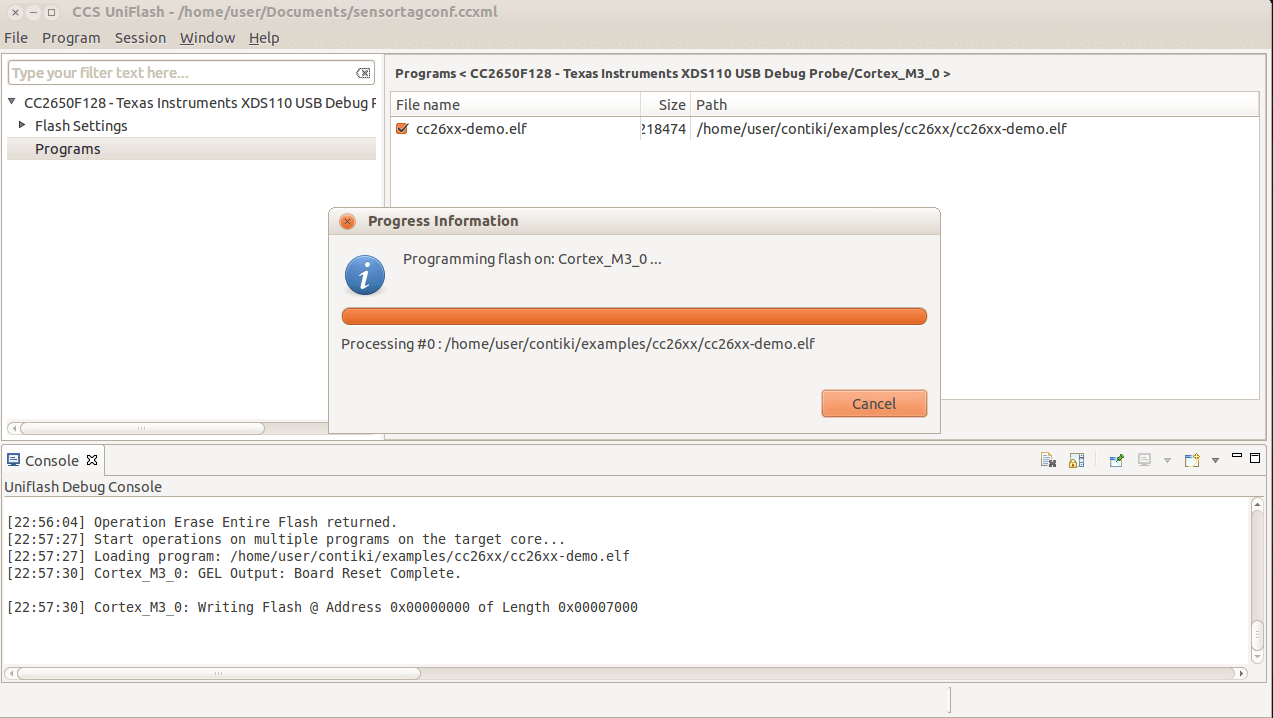
- Select "Programs"
- Click on "Add" button
- Select your program (.elf file)
- Click on "Program" button !
Well done ;) You are now ready to make your own program and flash your Sensortag as you need!
Links and credits
- TI Sensortag
- Instant Contiki
- Contiki's Github and see which products they support.
Member discussion