Docker + Laravel + PHP7 + AWS Elastic Beanstalk

In this post you will learn how to deploy your Laravel project on an Amazon Elastic Beanstalk. The Laravel project will be stored in a Docker container which also contains the latest version of PHP7 (PHP 7.0.12) and an Apache HTTP Server.
0. Requirements
1. Project hierarchy
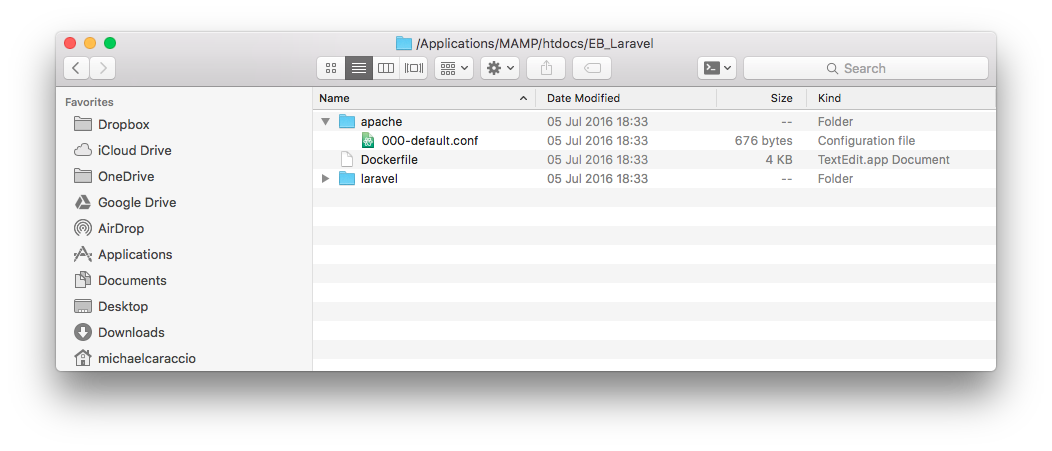
- Apache folder contains the apache configuration file.
- Dockerfile is a Docker file that describes the image
- Laravel folder contains the web application
2. Create a Laravel Project
Inside the folder "laravel" create your new website :
composer create-project --prefer-dist laravel/laravel laravel
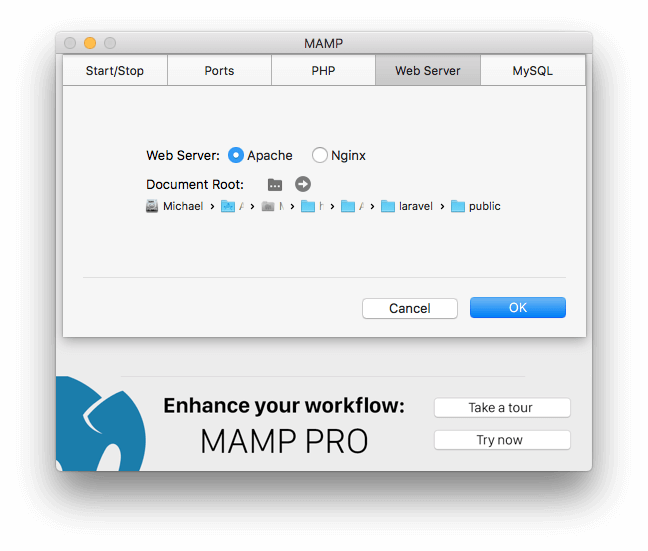
Check if your installation is successful using MAMP (or WAMP, etc) and change the root folder (select the public folder of your Laravel project) :
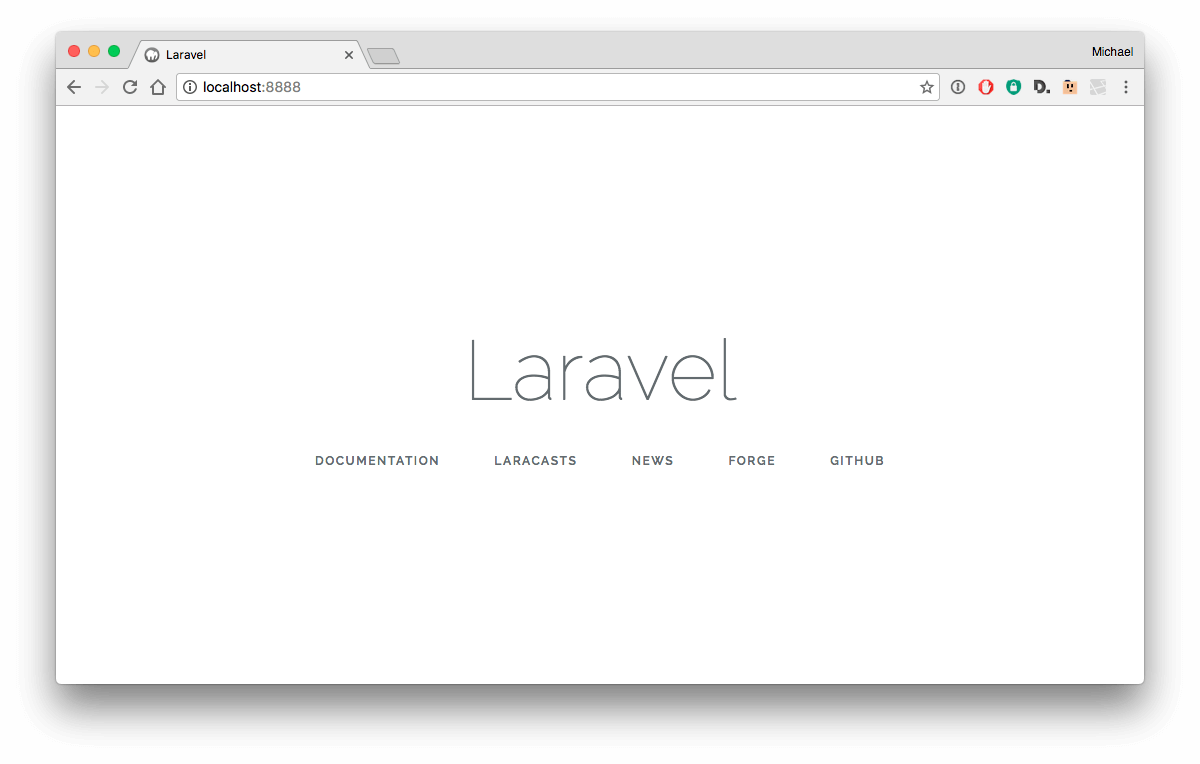
Your Laravel installation should display http://localhost:8888 (for MAMP) :
3. Create an Apache configuration file
In this file we need to specify the path of our website. In AWS, the document root is /var/www/html/public :
<VirtualHost *:80>
        ServerAdmin webmaster@localhost

        DocumentRoot /var/www/html/public
        <Directory />
                Options FollowSymLinks
                AllowOverride All
        </Directory>
        <Directory /var/www/html/public >
                Options Indexes FollowSymLinks MultiViews
                AllowOverride All
                Order allow,deny
                allow from all
        </Directory>

        ErrorLog ${APACHE_LOG_DIR}/error.log

        # Possible values include: debug, info, notice, warn, error, crit,
        # alert, emerg.
        LogLevel warn

        CustomLog ${APACHE_LOG_DIR}/access.log combined
</VirtualHost>
4. Create a Dockerfile
You can download the Dockerfile on my Gist
We start from the image PHP7. You can find more information about it on DockerHub : https://hub.docker.com/_/php/
This Dockerfile was used for a personal project. Feel free to edit it.
Few comments about the Dockerfile :
-
Line 60-66 : Edit the configuration of PHP. You need to adapt it to your EC2.
-
Line 73 : Move the file apache/000-default.conf to the folder /etc/apache2/sites-available/ to create our virtual host.
-
Line 80 : RUN chown -R www-data:www-data /var/www/html change folder permission
-
Line 81 : ADD ./laravel /var/www/html Let's move our laravel website
-
Line 84 : WORKDIR /var/www/html The current working directory will be /var/www/html
-
Line 95-97 : Change the locale and Timezone. Here it is in French and Europe/Paris
FROM php:7.0.12-apache

ENV DEBIAN_FRONTEND=noninteractive

# Install the PHP extensions I need for my personal project (gd, mbstring, opcache)
RUN apt-get update && apt-get install -y libpng12-dev libjpeg-dev libpq-dev git mysql-client-5.5 wget \
	&& rm -rf /var/lib/apt/lists/* \
	&& docker-php-ext-configure gd --with-png-dir=/usr --with-jpeg-dir=/usr \
	&& docker-php-ext-install gd mbstring opcache pdo zip

RUN apt-get update && apt-get install -y apt-utils adduser curl nano debconf-utils bzip2 dialog locales-all zlib1g-dev libicu-dev g++ gcc locales make build-essential

# Install imap extension
RUN apt-get install -y openssl
RUN apt-get install -y libc-client-dev
RUN apt-get install -y libkrb5-dev
RUN docker-php-ext-configure imap --with-kerberos --with-imap-ssl
RUN docker-php-ext-install imap

# Install bz2
RUN apt-get install -y libbz2-dev
RUN docker-php-ext-install bz2

# Install mysql extension
RUN apt-get update && apt-get install -y --force-yes \
    freetds-dev \
 && rm -r /var/lib/apt/lists/* \
 && cp -s /usr/lib/x86_64-linux-gnu/libsybdb.so /usr/lib/ \
 && docker-php-ext-configure pdo_mysql --with-pdo-mysql=mysqlnd \
 && docker-php-ext-install \
    pdo_dblib \
    pdo_pgsql

# Install Tokenizer
RUN docker-php-ext-install tokenizer

# Install ftp extension
RUN docker-php-ext-install ftp

# APC
RUN pear config-set php_ini /usr/local/etc/php/php.ini
RUN pecl config-set php_ini /usr/local/etc/php/php.ini
RUN pecl install apc

RUN a2enmod rewrite
RUN a2enmod expires
RUN a2enmod mime
RUN a2enmod filter
RUN a2enmod deflate
RUN a2enmod proxy_http
RUN a2enmod headers
RUN a2enmod php7

RUN curl -sS https://getcomposer.org/installer | php -- --filename=composer --install-dir=/usr/local/bin
RUN curl -sL https://deb.nodesource.com/setup | bash -
RUN apt-get install -y nodejs build-essential
RUN npm install -g phantomjs-prebuilt casperjs

# Edit PHP INI
RUN echo "memory_limit = 1G" > /usr/local/etc/php/php.ini
RUN echo "upload_max_filesize = 50M" >> /usr/local/etc/php/php.ini
RUN echo "post_max_size = 50M" >> /usr/local/etc/php/php.ini
RUN echo "max_input_time = 60" >> /usr/local/etc/php/php.ini
RUN echo "file_uploads = On" >> /usr/local/etc/php/php.ini
RUN echo "max_execution_time = 300" >> /usr/local/etc/php/php.ini
RUN echo "LimitRequestBody = 100000000" >> /usr/local/etc/php/php.ini

# Clean after install
RUN apt-get autoremove -y && apt-get clean all

# Configuration for Apache
RUN rm -rf /etc/apache2/sites-enabled/000-default.conf
ADD apache/000-default.conf /etc/apache2/sites-available/
RUN ln -s /etc/apache2/sites-available/000-default.conf /etc/apache2/sites-enabled/
RUN a2enmod rewrite

EXPOSE 80

# Change website folder rights and upload your website
RUN chown -R www-data:www-data /var/www/html
ADD ./laravel /var/www/html

# Change working directory
WORKDIR /var/www/html

# Install and update laravel (rebuild into vendor folder)
RUN composer install
RUN composer update

# Laravel writing rights
RUN chgrp -R www-data /var/www/html/storage /var/www/html/bootstrap/cache
RUN chmod -R ug+rwx /var/www/html/storage /var/www/html/bootstrap/cache

# Change your local - here it's in french
RUN echo "locales locales/default_environment_locale select fr_FR.UTF-8" | debconf-set-selections \
&& echo "locales locales/locales_to_be_generated multiselect 'fr_FR.UTF-8 UTF-8'" | debconf-set-selections
RUN echo "Europe/Paris" > /etc/timezone && dpkg-reconfigure -f noninteractive tzdata

# Create Laravel folders (mandatory)
RUN mkdir -p /var/www/html/storage/framework
RUN mkdir -p /var/www/html/storage/framework/sessions
RUN mkdir -p /var/www/html/storage/framework/views
RUN mkdir -p /var/www/html/storage/meta
RUN mkdir -p /var/www/html/storage/cache
RUN mkdir -p /var/www/html/public/uploads/

# Change folder permission
RUN chmod -R 0777 /var/www/html/storage/
RUN chmod -R 0777 /var/www/html/public/uploads/

CMD ["/usr/sbin/apache2ctl", "-D", "FOREGROUND"]
5. Create an Amazon Elastic Beanstalk project
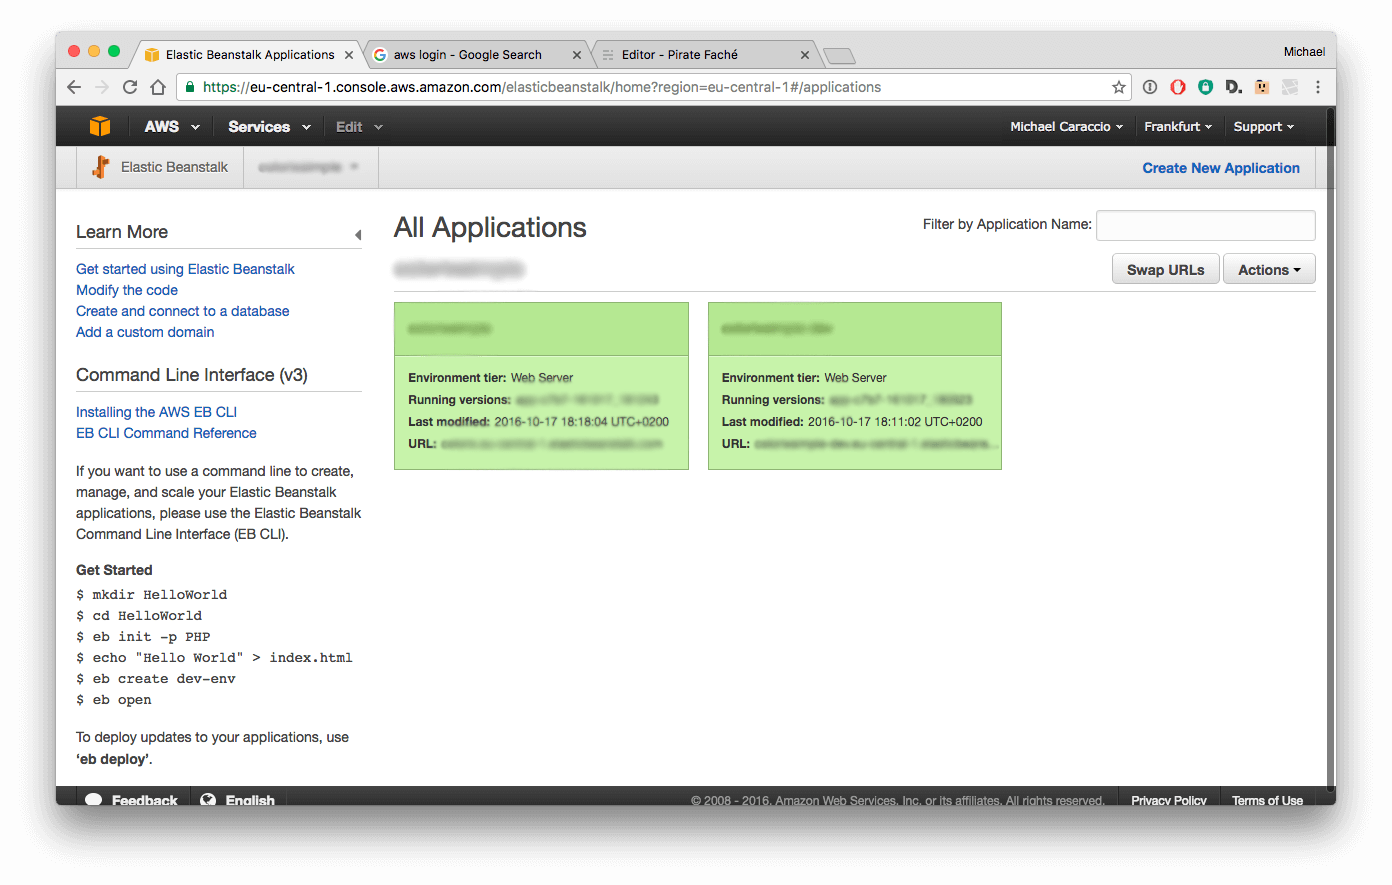
Log into your AWS Console : AWS Console login
-
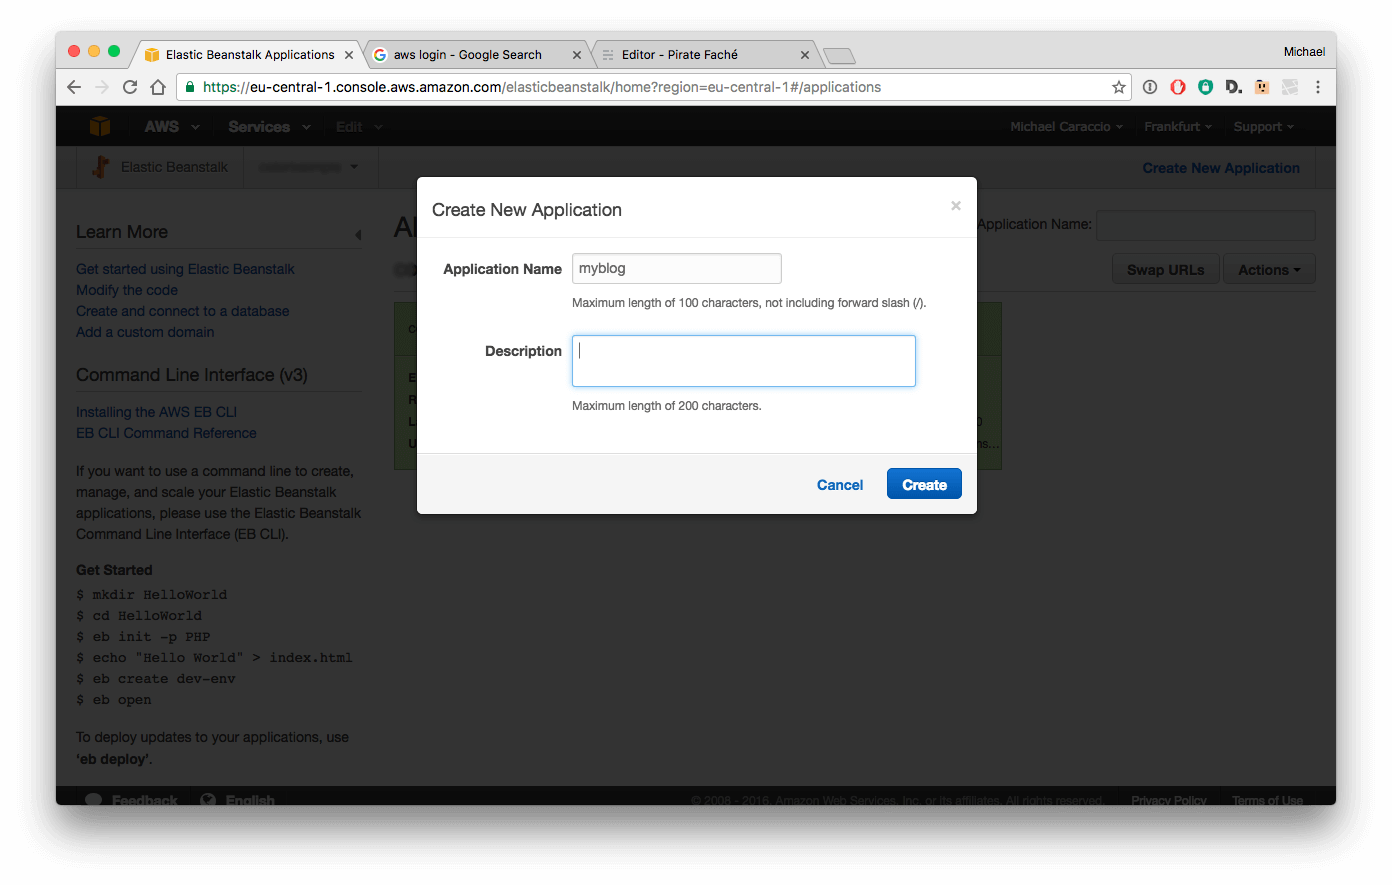
Create a new application on Elastic Beanstalk Application
-
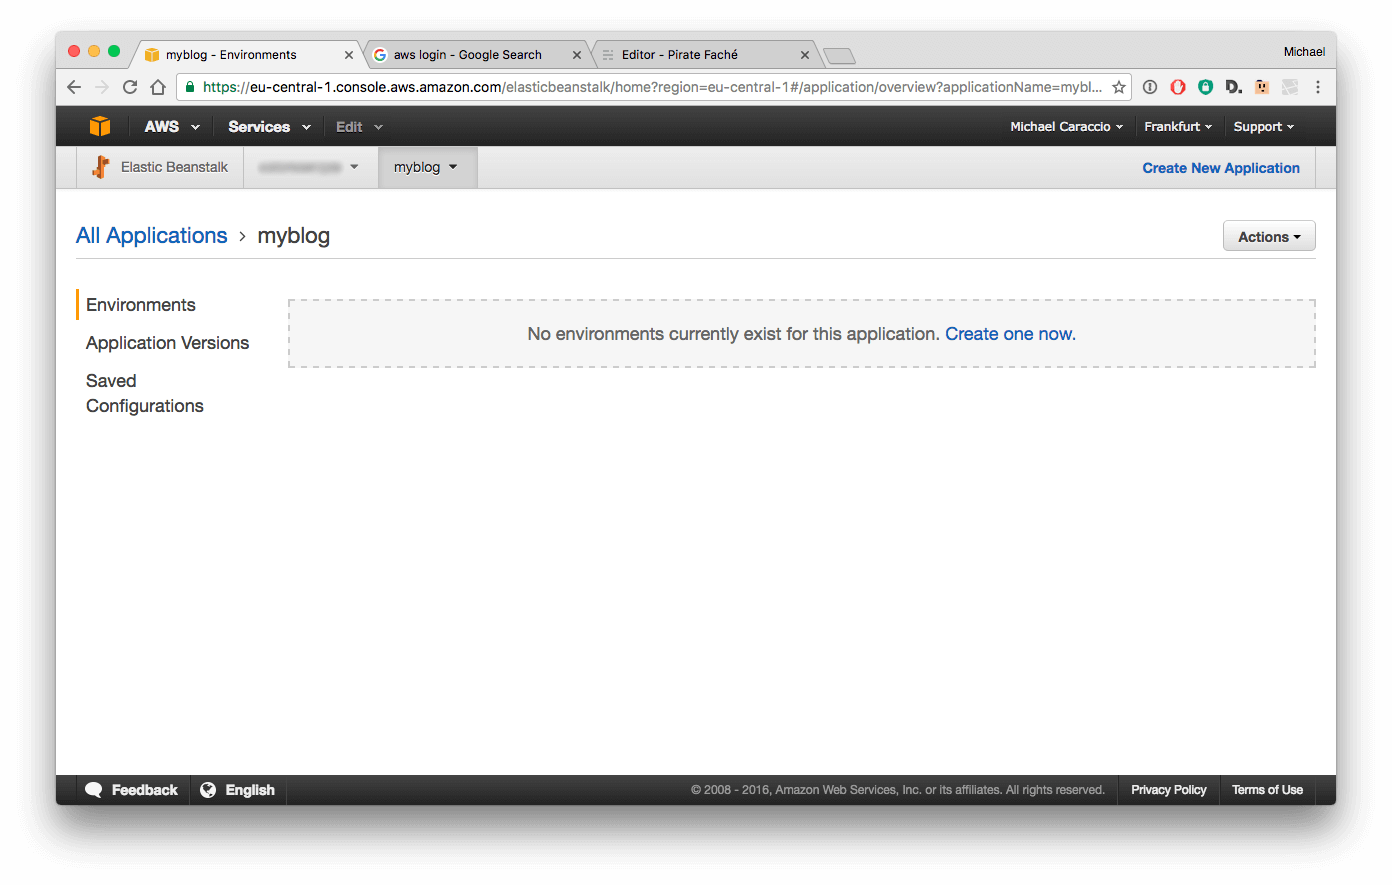
Create a new Environnement
-
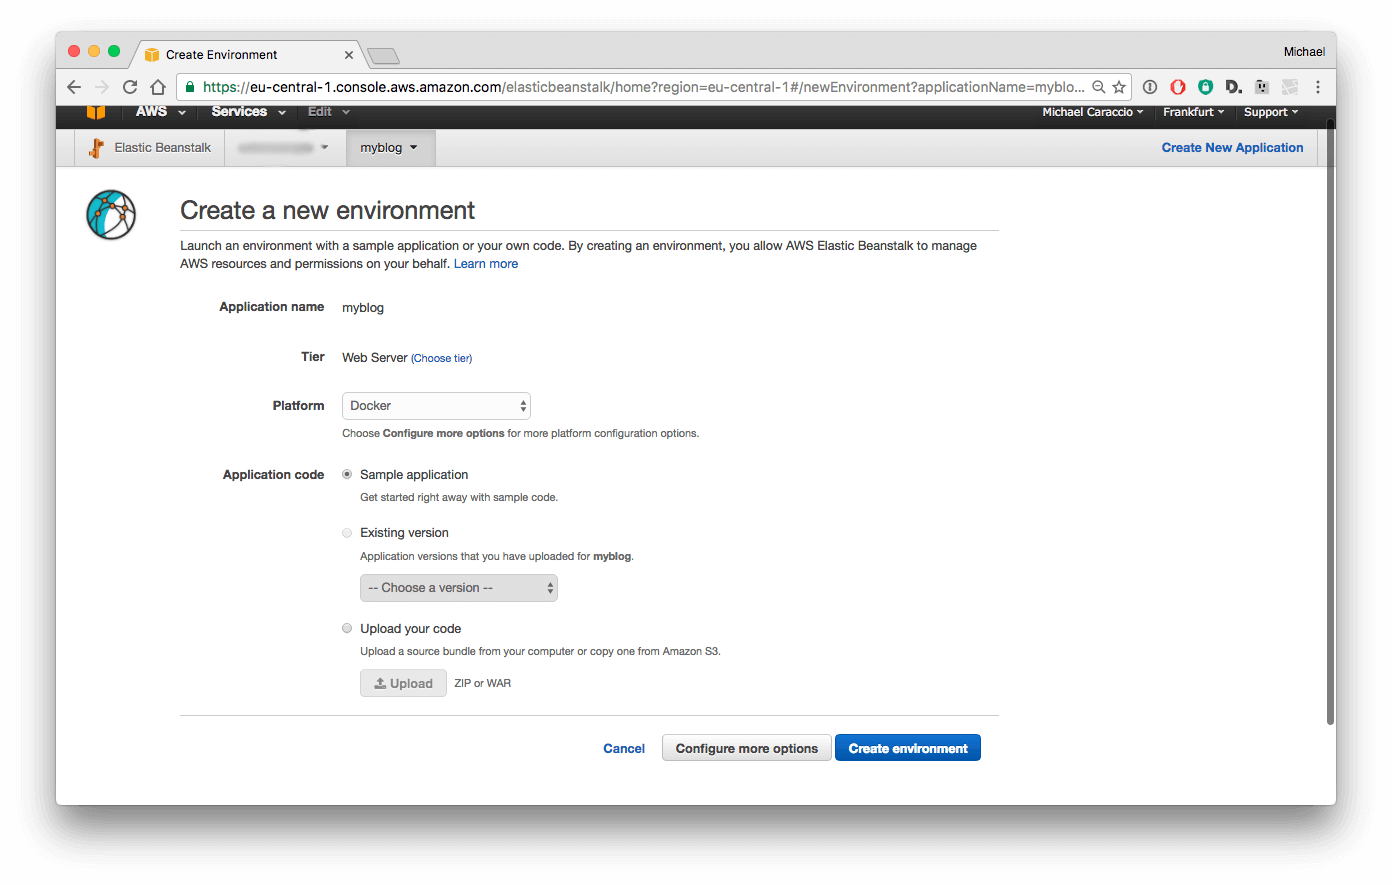
Select Docker for the Platform
6. Create an RDS Database
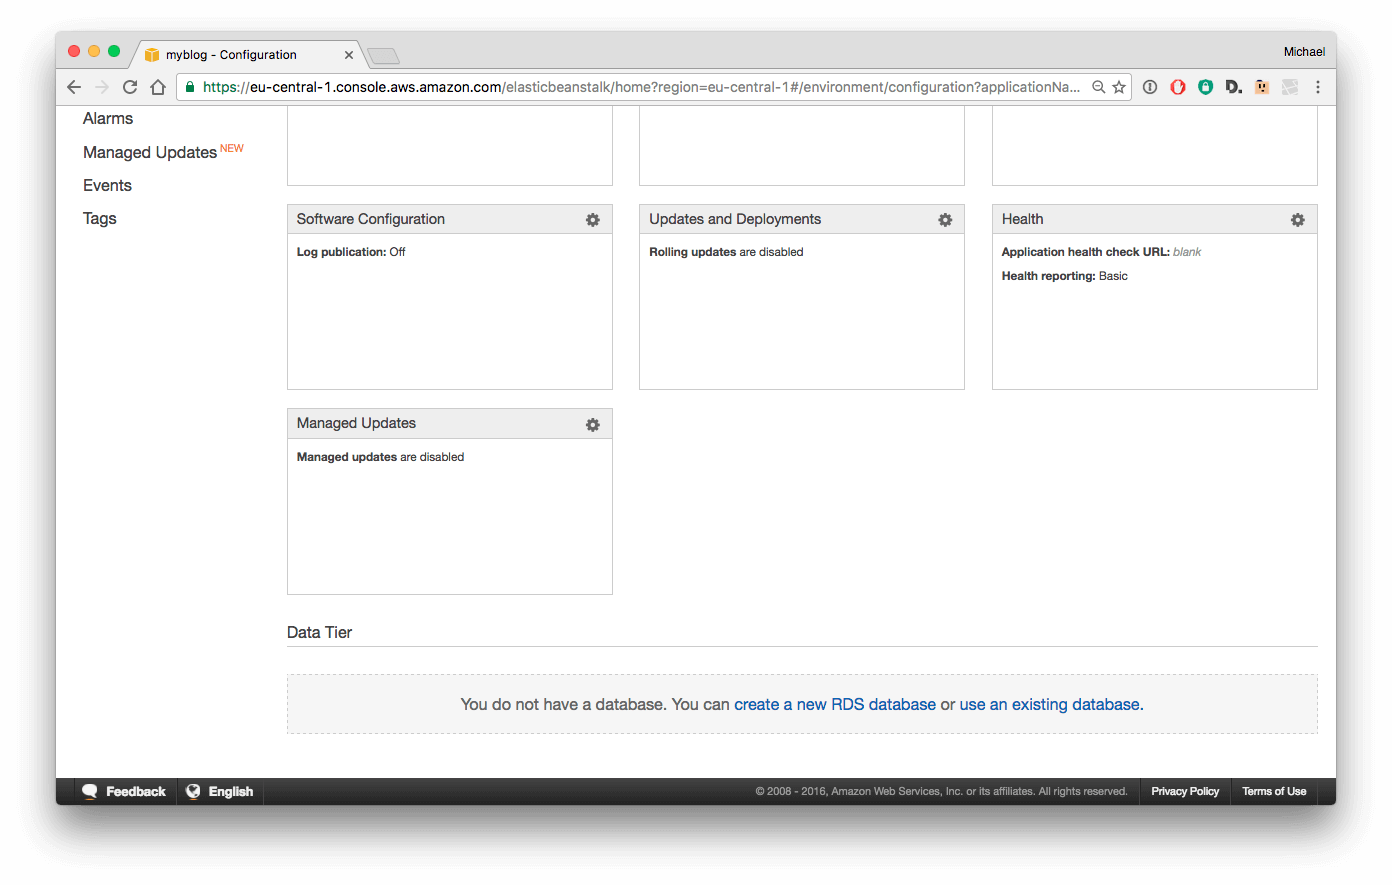
In your Amazon application, click on Configuration (left panel) :
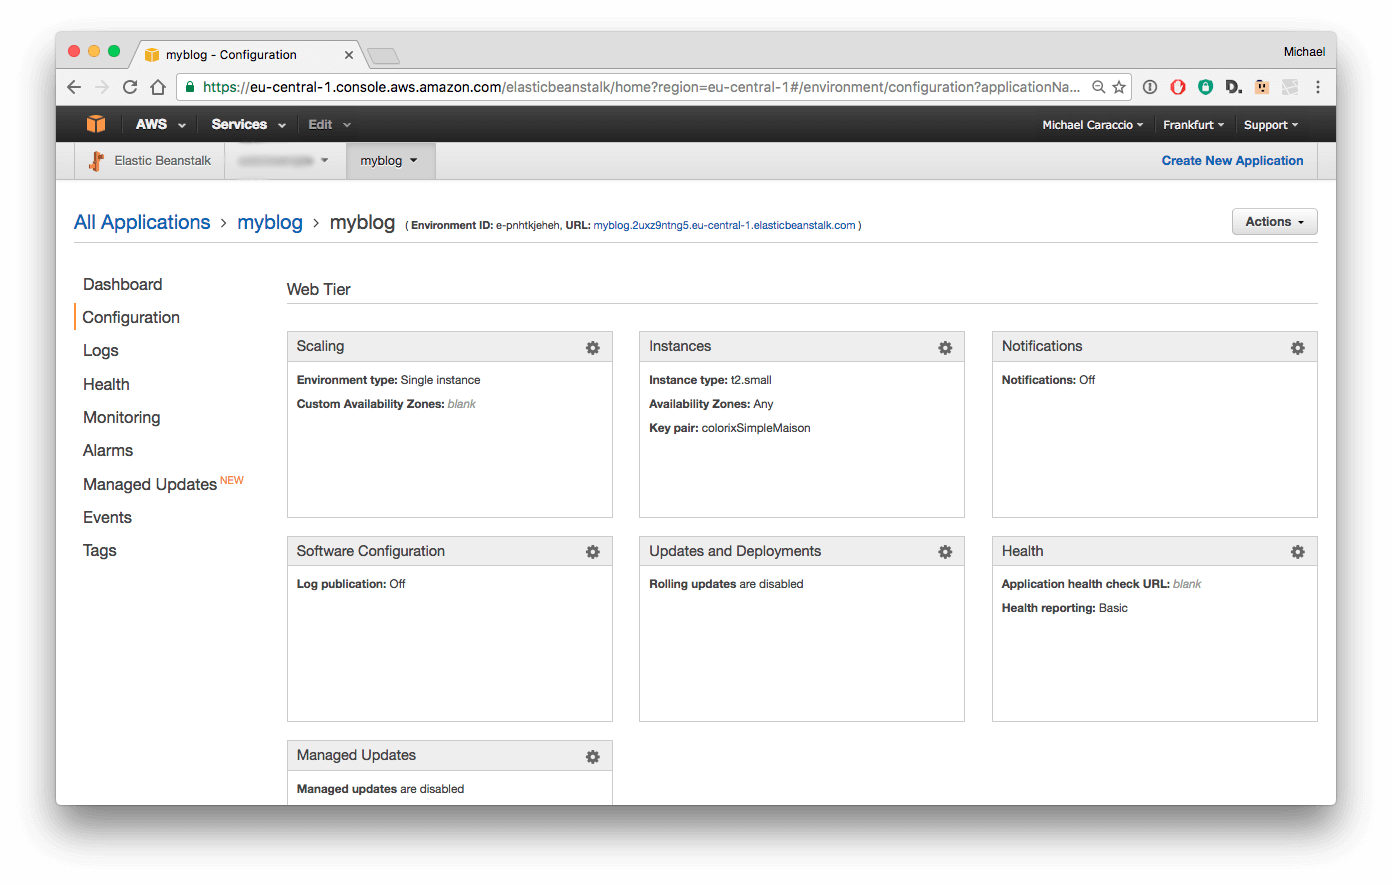
Now at the bottom of the page, click on Create a new RDS database
Configure your RDS Database and click on Apply:
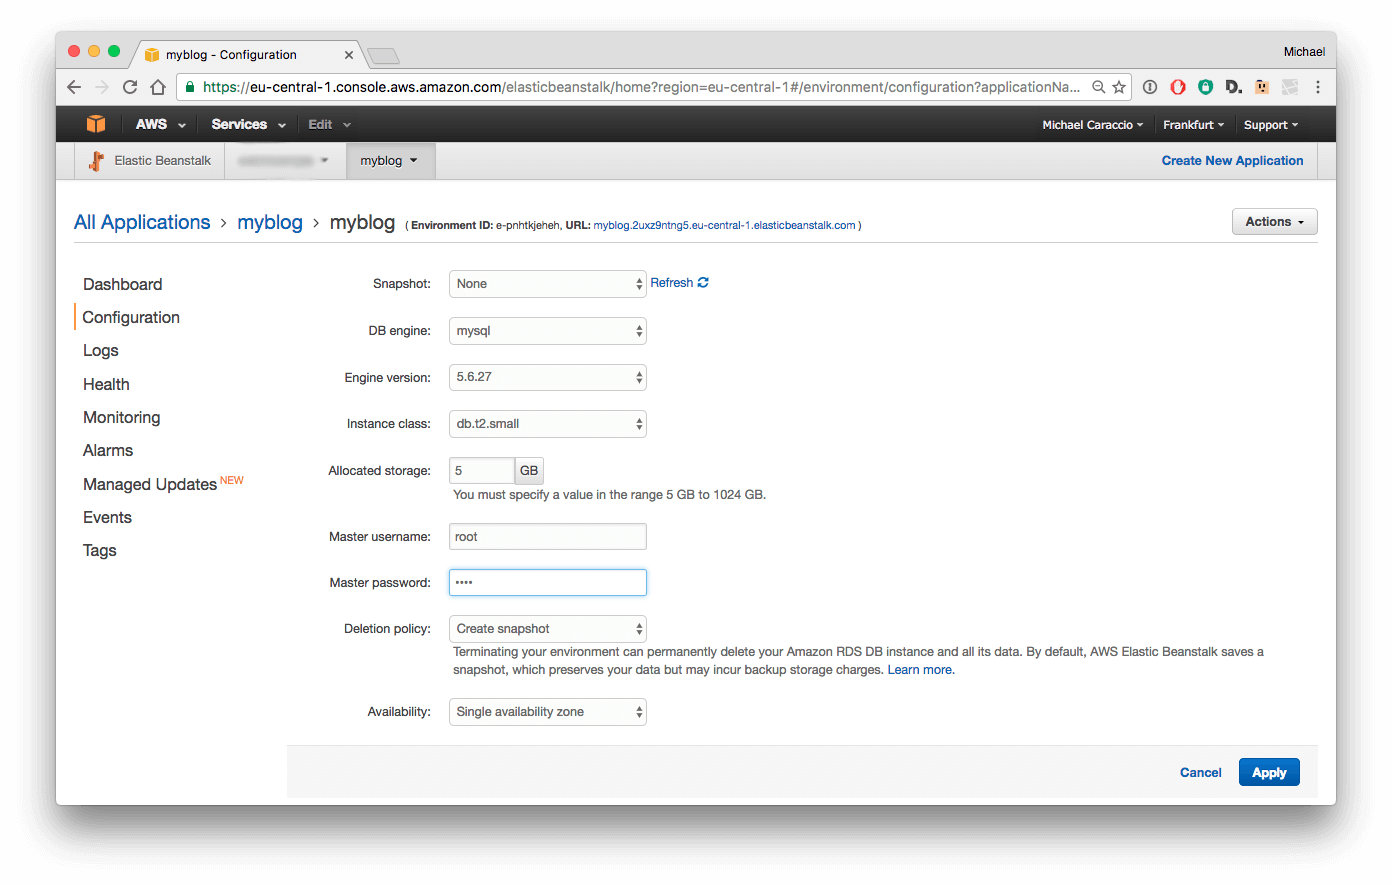
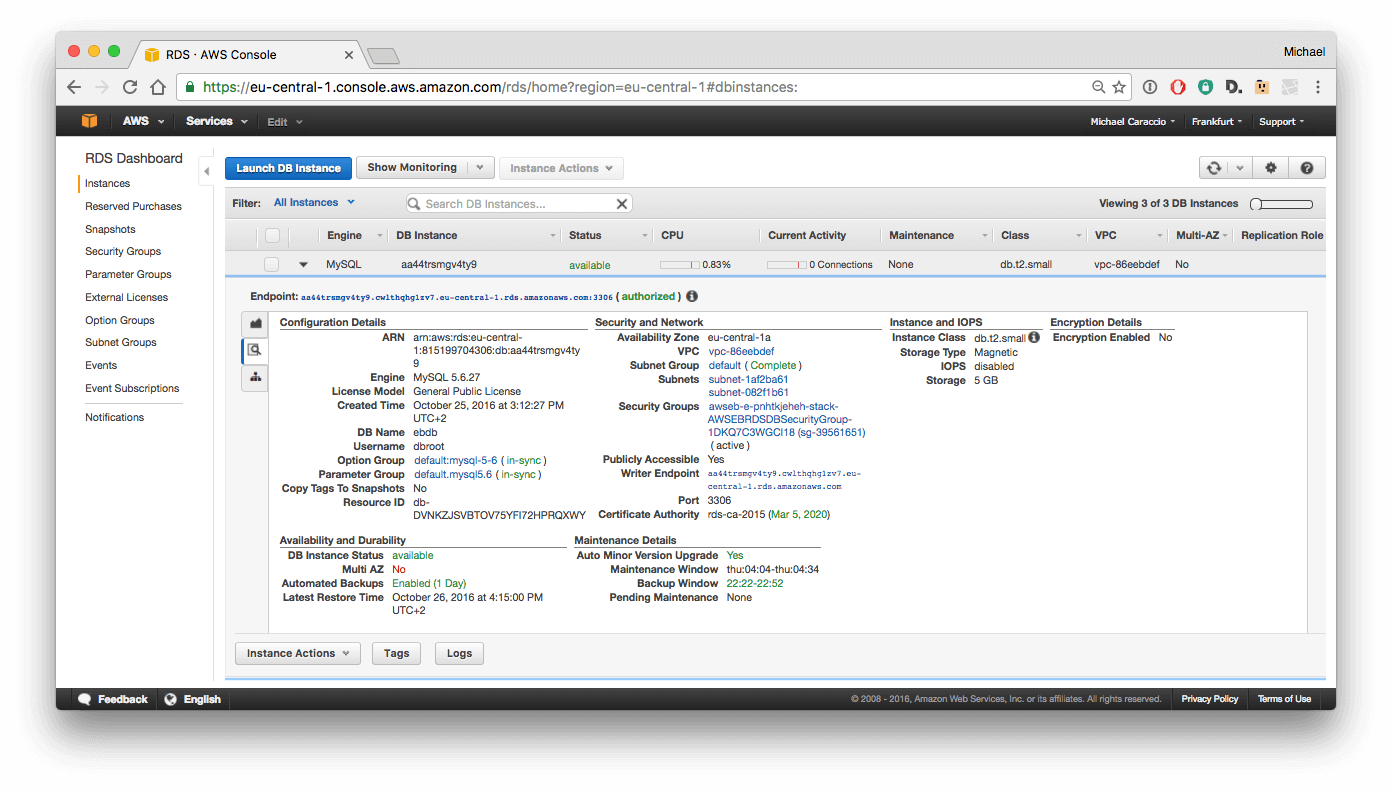
You have to wait a few minutes, Amazon needs time to create your RDS Database.
For the step 7, you need to keep in mind your Host url (DB_HOST) and database name(DB_DATABASE) :
7. Link your RDS with Laravel
Go back your application configuration page and click on Software Configuration :
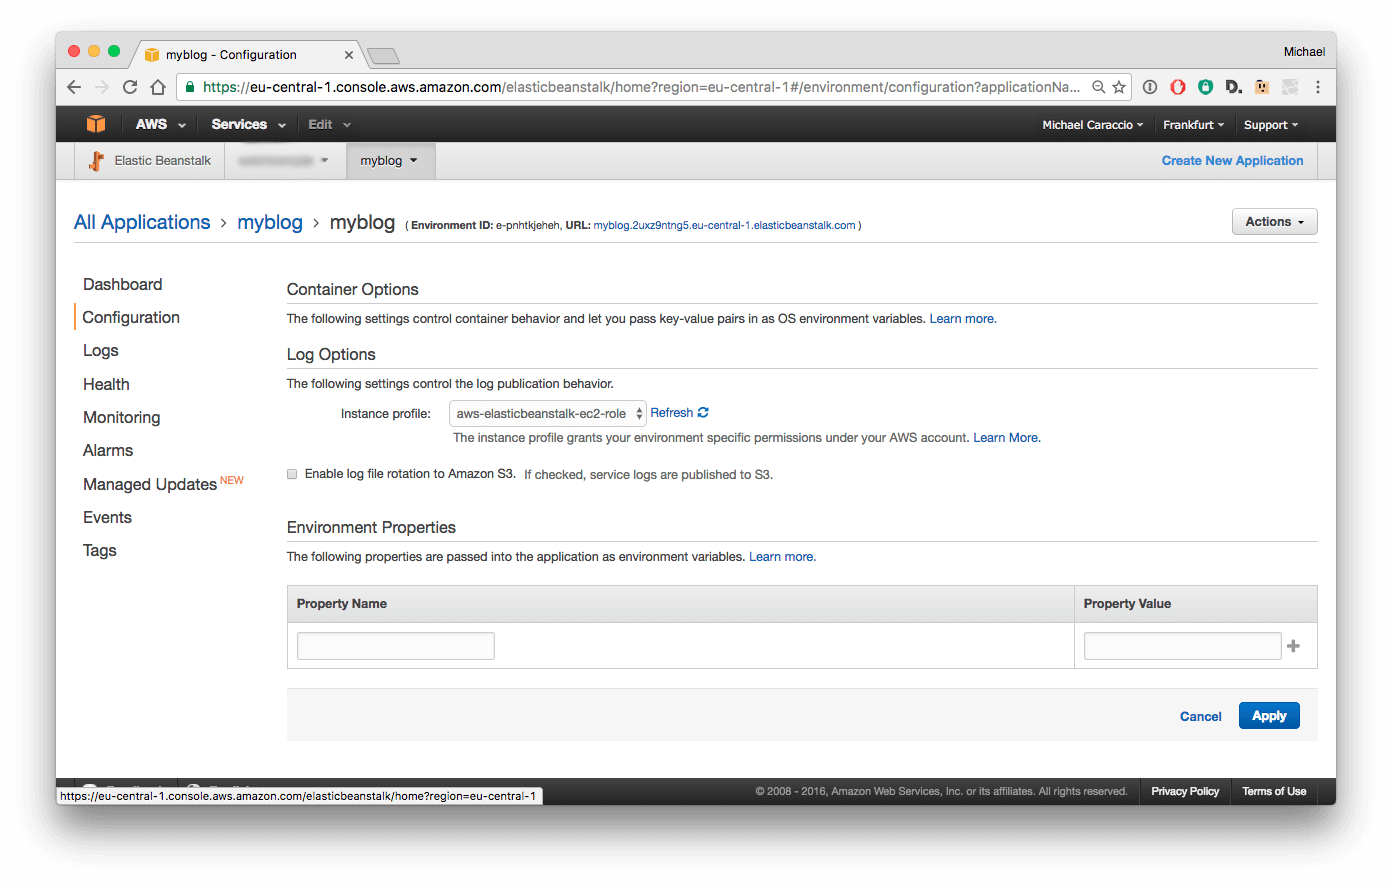
Instead of using a .env file, we are going to describe your .env file environment properties directly on your EB Application configuration. It will be easier to change your properties from here and using this method you don't have to commit your .env file (which contains your database user and password).
Open your local .env file and copy/paste each properties/values ...
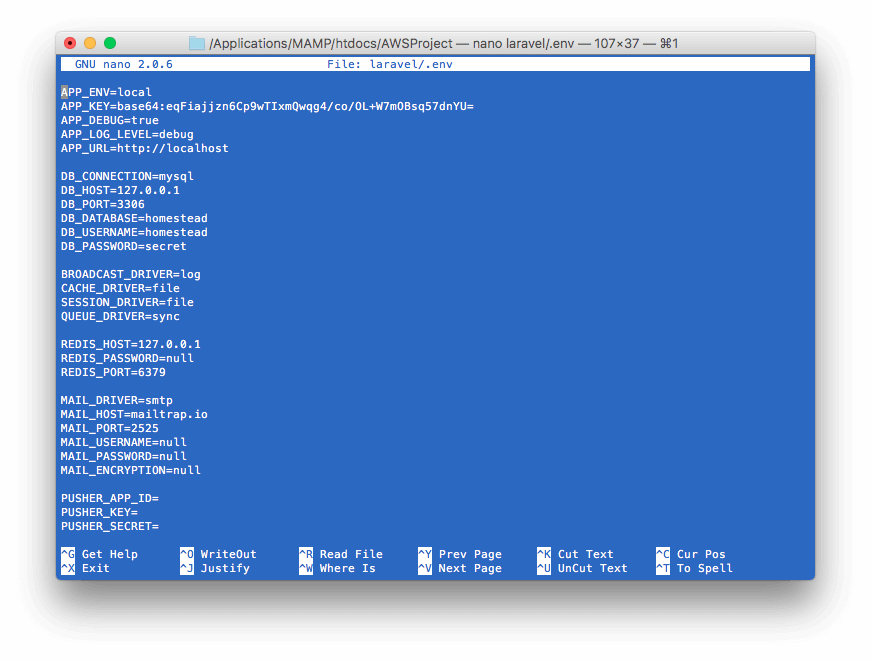
... in your AWS Application configuration :
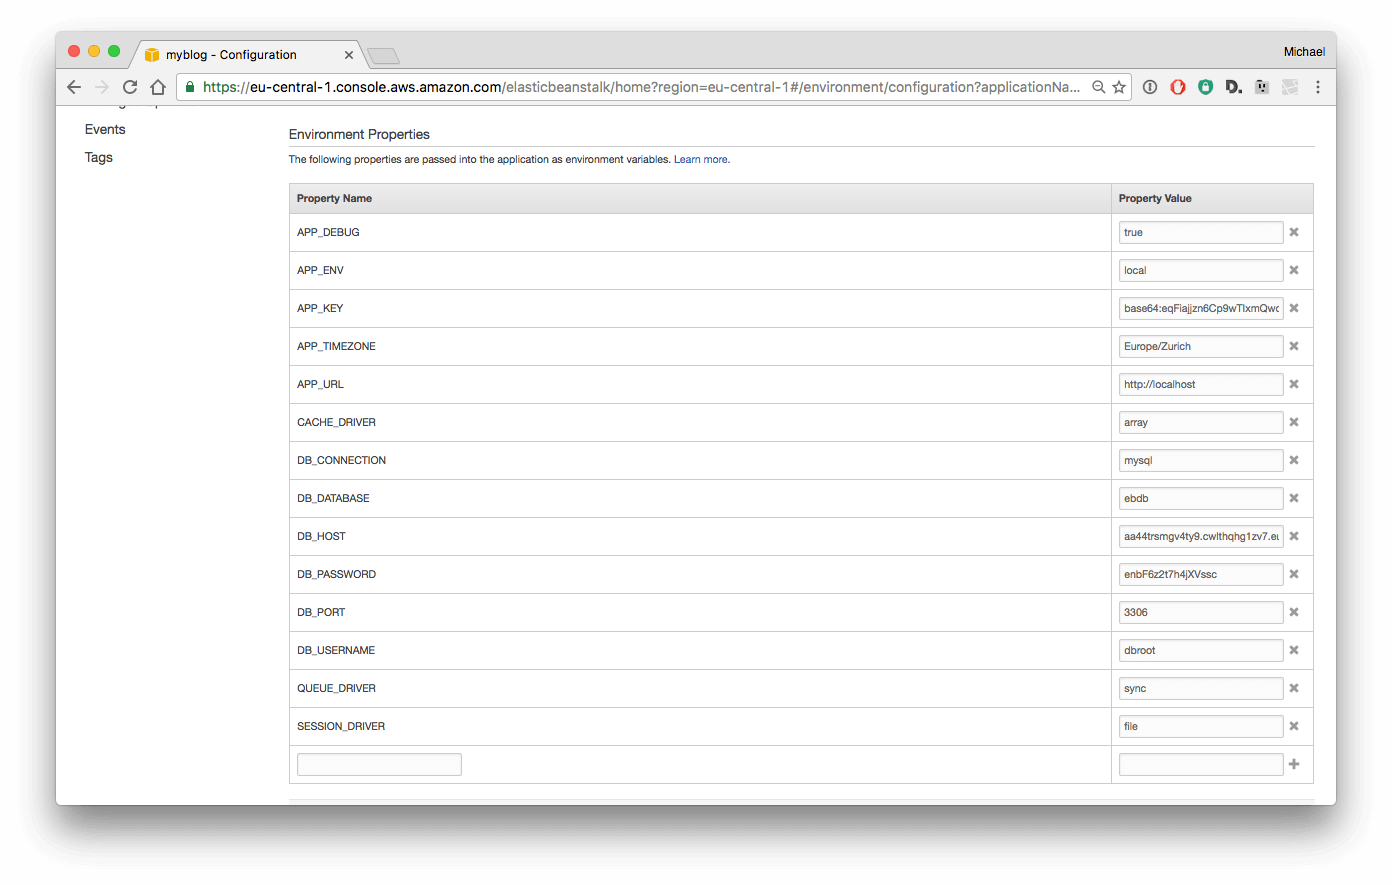
Click on Apply to save your configuration.
8. Publish your website
You're ready to upload your website on AWS. Go back to your project folder.
1. Create your Elastic Beanstalk project :
eb init
Select the region and your environment you created before.
2. Create a git project
git init
3. Commit your files
git add --all
git commit -m "First commit"
4. Publish it
eb deploy myblog --timeout 20000

Do not forgot the timeout option. It takes a long time to create your new instance. If you have an error (Failed to deploy application.), repeat the same command.
5. Test it
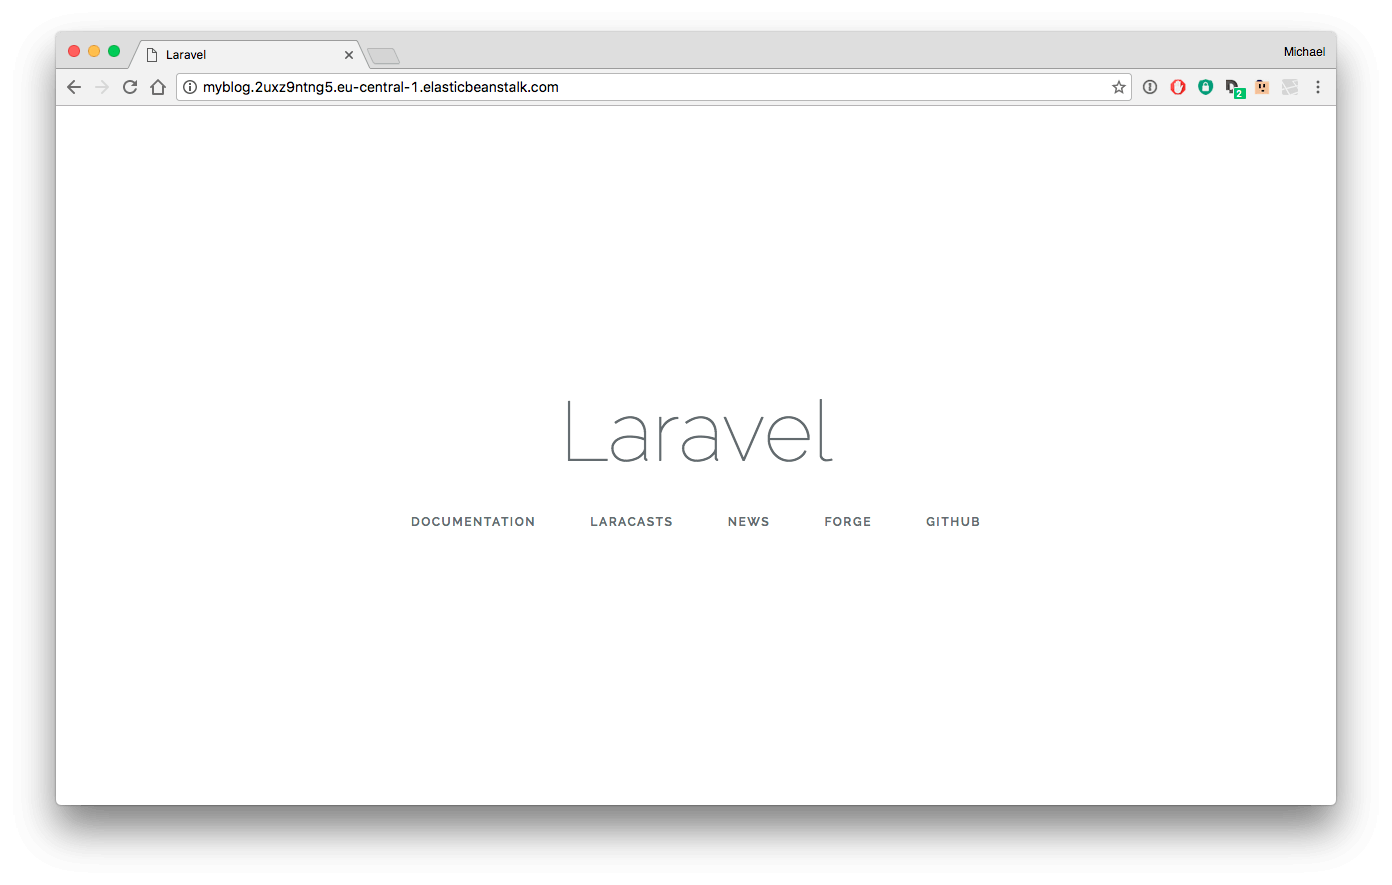
Member discussion